Removing Painted Brick Indoors Without Scarring the Original Face
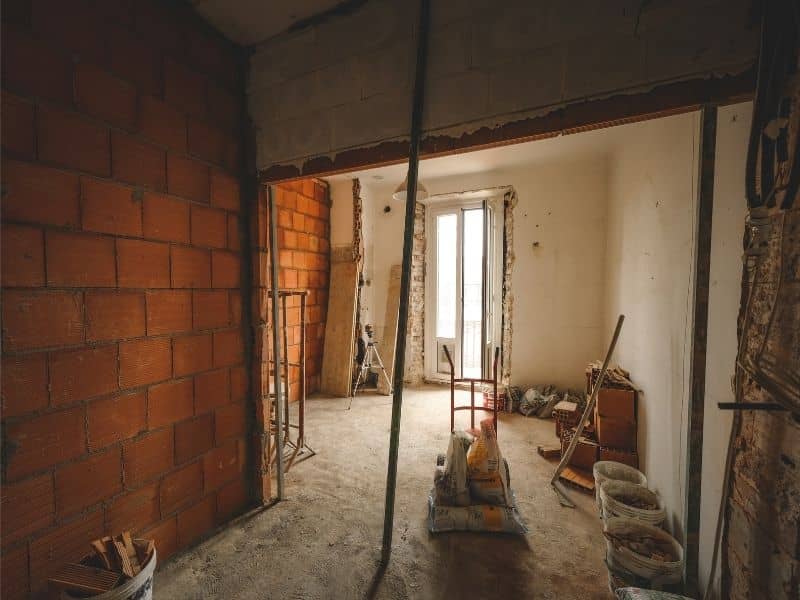
Partially renovated interior with exposed brick walls, illustrating work involving painted brick

Painted brick shows up in a lot of older homes. Someone painted over it decades ago, and now a new owner wants that brick back. The problem is that paint removal can do more harm than the paint ever did. Done wrong, it scars the brick face for good. Done right, it brings the original material back without wrecking it.

Assess the Original Brick Face Beneath the Paint

Before any stripping starts, look at what you’re actually working with. Old interior brick isn’t all the same. Some bricks were fired soft and porous. Others are dense and hard. Age matters too. A fireplace wall from the 1920s can react very differently to a stripping agent than brick from a 1960s addition.

Check for soft spots, chips, or crumbling mortar joints first. If the brick face already feels weak under light pressure, aggressive paint removal will make that worse fast. The goal isn’t to strip every wall down to bare brick no matter what. It’s to figure out how much of that original face can come through safely, and where you should stop.

Check Older Painted Brick for Lead Before Disturbance

If your home was built before 1978, assume the paint on that brick could contain lead until you know otherwise. This isn’t a small detail. Scraping, sanding, or heating old paint can release dust that’s dangerous to breathe, especially for kids and pregnant women in the house.

The EPA recommends testing painted surfaces in older homes before you disturb them, and using lead-safe work practices if lead is present. That can mean containing the work area, using wet methods to keep dust down, and cleaning up with HEPA vacuums instead of a broom. Skipping this step to save time isn’t worth the risk to your family’s health.

Test Paint Removal on a Concealed Brick Area

Once you know what you’re dealing with, don’t jump straight to the whole wall. Pick a small spot that won’t be seen, like behind a bookshelf or low near the floor, and test your method there first.

This step tells you a lot. Paint often soaks deep into brick pores over the years, and you won’t know how deep until you try to pull it out. A test patch shows whether the stripper you picked actually works, or whether it needs more time to sit. It also shows if the process changes the brick’s color or leaves it looking patchy. Preservation guidance from the General Services Administration points to test patches for this exact reason. They help you find the gentlest method that still gets the job done, before you commit to an entire fireplace or chimney breast.

Remove Painted Brick Without Grinding Away Its Face

This is the part where most damage happens. The goal is removing the paint, not removing a layer of the brick along with it. That distinction matters more than people think.

Grinding, sandblasting, and high-pressure washing all seem like fast fixes. They’re also the fastest way to ruin old brick. These methods chew into the surface, wear down mortar joints, and leave a rough, pitted look that can’t be undone. Once that face is gone, it’s gone. Preservation guidance is consistent on this point. Abrasive removal methods can permanently damage masonry surfaces and the mortar holding them together.

Chemical strippers made for masonry, applied in thin coats and given time to work, are usually the safer route. So are low-pressure methods paired with hand tools like soft brushes or wooden scrapers. It takes longer. It also leaves you with brick that still looks like brick when you’re done, not brick that’s been sanded down to a shadow of itself.

Evaluate the Exposed Brick Before Finishing the Renovation

After the paint is gone, don’t assume the job is finished. Walk the wall and look closely. Some spots may still hold a thin layer of old paint in the pores, especially in corners or along mortar lines. That’s common, and it’s not always worth chasing down.

Check the mortar joints too. Years under paint can hide weak spots, and stripping can expose crumbling or missing mortar that needs attention before you move forward. Look for chipped or thin areas on the brick face where more stripping would do damage instead of good.

This is also the point to decide where to stop. Not every square inch has to come back to bare brick. In a lot of historic home renovations, leaving a light stain or a small patch of old paint behind is the better call than pushing further and losing the original face underneath. A finished wall that keeps its character beats one that’s been stripped past the point of no return.
Fireplace Changes After New Flooring Raises the Finished Floor Level

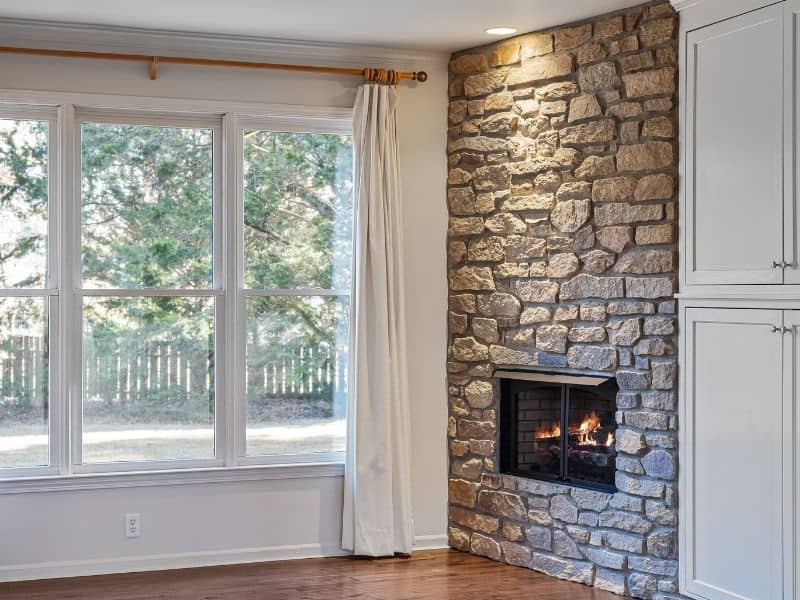
Stone fireplace meeting a hardwood floor, showing the hearth-to-floor transition

New floors change more than the way a room looks. In older homes, a fresh layer of flooring can push the finished floor height up just enough to throw off the fireplace transition. That small shift matters more than most homeowners expect.

Fireplace changes tied to new flooring aren’t about the firebox or the chimney. They’re about the line where the floor meets the hearth. Get that line wrong, and you end up with a trip hazard, a gap that traps debris, or a hearth edge that looks unfinished no matter how nice the new floor is.

How New Flooring Changes the Fireplace-to-Floor Transition

A hearth was built to match the floor height that existed at the time. Add new flooring on top of the old subfloor, and that relationship shifts.

Hardwood, tile, and laminate all add thickness. So does the underlayment beneath them. In many older homes, the original floor was thin hardwood or even a bare subfloor with minimal buildup. Layer new materials on top, and the floor can rise anywhere from a fraction of an inch to well over an inch.

That rise changes how the floor meets the hearth edge. The hearth was likely built flush, or close to flush, with the old floor. Once the new floor goes in, the hearth can end up lower than it used to be relative to the room. The masonry itself hasn’t moved. The floor around it has.

This isn’t a problem you notice right away. It shows up after the flooring crew leaves, when someone walks toward the fireplace and catches a toe on an edge that used to sit flat.

Measure Finished Floor Height Before Making Fireplace Changes

The fix starts before a single plank goes down. Someone needs to add up every layer in the planned flooring buildup and compare that total to the current hearth height.

That means accounting for:

  • The flooring material itself (hardwood, tile, laminate, or vinyl)
  • Underlayment or backer board beneath it
  • Leveling compound, if the subfloor needs it
  • Any transition strips or thresholds planned near the hearth

Skip this step, and the numbers only get worked out after the floor is already installed. At that point, fixing the transition means cutting into finished work instead of planning around it.

A simple tape measure and a written buildup schedule solve most of this. The goal is one number: how high will the finished floor sit compared to where it sits today. That number decides whether the hearth needs any adjustment at all.

When a Higher Floor Leaves the Hearth Edge Uneven

Sometimes the math works out fine. The new floor rises a little, the hearth was already raised enough to handle it, and nothing needs to change.

Other times, the new floor ends up closer to the hearth height than before, level with it, or even slightly above it. That’s when problems start. A hearth edge that used to stand up above the floor can end up nearly flush. A hearth that was already close to floor level can end up sitting lower than the surrounding room.

Either version creates the same issue. The transition stops reading as a clean line and starts reading as a mistake. Furniture placement gets awkward. Rugs won’t lie flat. And in homes with young kids or older residents, an uneven step at the fireplace becomes a fall risk that didn’t exist before the renovation.

This is worth checking before the flooring installer commits to a final height. A masonry professional can look at the existing hearth edge and tell you whether it needs to be built up, trimmed down, or left as is once the new floor goes in.

Detail the Flooring-to-Masonry Joint Before Installation

The joint where flooring meets brick or stone is easy to improvise and hard to fix later. Wood flooring needs an expansion gap near masonry, since it moves with humidity and temperature in ways that brick doesn’t. Tile needs a different approach, often a grout line or a metal transition piece sized for the gap. Laminate has its own requirements, usually involving a flexible sealant rather than a rigid connection.

Decide on this joint before flooring goes in, not after. Once tile is grouted or wood is nailed down tight against the hearth, changing the approach means removing finished flooring to redo the edge.

Talk through the joint detail with whoever is doing the flooring work. Ask what gap they plan to leave, what material will fill it, and how that material holds up against a masonry surface that can carry heat when the fireplace is in use. A joint built for a cold wall doesn’t always hold up the same way next to a working hearth.

Coordinate Fireplace Changes Before Final Interior Finishes

The best outcome comes from getting the mason and the flooring contractor talking to each other before either one starts cutting material. Elevations, joint details, and hearth condition all need to line up before baseboards, trim, and final flooring go in.

In practice, this means one short conversation early on. The mason confirms the current hearth height and flags any masonry work needed to match the new floor. The flooring contractor confirms the exact buildup height once materials are chosen. Both numbers get compared against each other, not assumed.

Once trim and baseboards go in, adjusting the hearth or the floor transition gets a lot more disruptive. Coordinating early costs almost nothing. Coordinating late costs time, money, and a redo on work that already looked finished.

Brick Patio Heights Near Exterior Doors Can Create Drainage Trouble

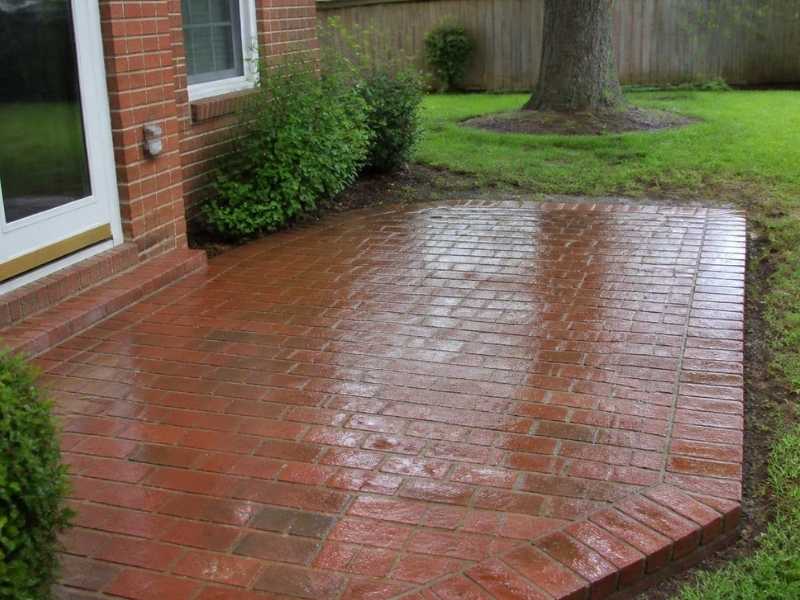
Brick patio below an exterior door threshold for proper drainage in Birmingham, Alabama.

A brick patio makes a great spot to sit and relax by the back door. It looks clean, holds up well, and adds real value to a home. The trouble starts when that patio sits too high next to the door.

Set the patio too close to the threshold, and rain has an easy path indoors. Water follows the lowest route it can find. If the brick surface is level with or above the door, that route may lead straight into your home. The result is wet floors, damaged trim, and repairs no one wants.

Here is the takeaway. A brick patio near an exterior door needs the right height and slope to keep water out. The threshold is the bottom edge of the door opening, and the patio must sit safely below it. Careful stonework and grading help keep the finished surface at the proper elevation. The sections below explain how to plan the height, grade the surface, and check the work before it is done.

Why Patio Height Matters Near Exterior Door Thresholds

The threshold is where the patio meets the house. It is the strip at the base of the door that seals the opening. If the pavers sit too high, water can rise above the threshold and slip into the home.

Builders leave a gap between the finished patio and the threshold for good reason. That gap keeps rain, splashing, and runoff below the door. A common guideline is to set the patio surface several inches below the threshold, though the right amount can vary by door type and site. Your mason or builder can confirm the target for your project.

Skip that gap, and problems follow fast. A patio built level with the door invites water inside during any hard rain. Heavy storms are common in Alabama, so this margin matters here. Getting the height right from the start protects the house.

How Poor Grading Can Direct Water Toward the Building

Grading is the shape and slope of the ground and paved surfaces. Good grading sends water away from the house. Poor grading does the opposite and steers it toward the foundation.

A brick patio should slope gently away from the building. This slope, often called a fall, lets water run off toward the yard. Without it, water sits on the surface or drifts back toward the door. Over time, that pooling can harm both the patio and the foundation.

Poor grading causes trouble beyond the doorway too. Water that collects near the base of a wall can seep in below grade. It can also feed moisture into masonry, leading to cracks over time. A proper slope keeps water moving in the right direction.

Using Site Elevations to Plan Brick Patio Construction

Elevations are the height measurements of points across a site. They show how the land and structures sit in relation to each other. For a brick patio, elevations guide how high to build and which way to slope.

Planning with accurate elevations prevents guesswork. A builder checks the height of the door threshold, the existing ground, and any nearby drainage. Those numbers set the target height and slope for the patio. A few key points to establish before building include:

  • The height of the door threshold
  • The finished height of the patio surface
  • The slope needed to drain water away
  • Where the runoff will go from the patio edge

Getting these numbers right early keeps the patio safe and dry. On tricky lots, a surveyor can provide precise elevations. That extra step helps when the ground already slopes toward the house.

Coordinating Patio Elevations With Drainage and Door Openings

A brick patio does not sit alone. It ties into the door, the yard, and the way water moves across the property. Planning all of these together avoids drainage trouble.

Start with the door opening as the fixed point. The patio height works backward from the threshold to keep water below it. Then the slope and surrounding grade guide runoff toward a safe outlet. When these pieces line up, the patio drains the way it should.

The runoff has to go somewhere useful. A good plan directs water toward the lawn, a drain, or a low area away from the house. It should never pool against the foundation or the door. Drainage rules can vary by municipality and county, so confirm any local requirements before building.

Checking Finished Grades Before Patio Construction Is Complete

The final check happens before the last brick is set. Finished grades are the surface heights and slopes once the patio is built. Confirming them protects against a costly mistake.

A builder should verify the patio still sits below the threshold. They should also confirm the slope carries water away from the house. Catching a problem now is easy. Fixing it after the patio is finished means tearing up brick.

This check is worth the time on every job. A quick review of heights and slopes can prevent years of water problems. Ask your mason to confirm the finished grades before wrapping up. If a permit or inspection applies, handle it before the work is called complete.

Frequently Asked Questions

How far below the door should a brick patio sit?

The patio should sit low enough to keep water below the threshold. A common guideline is several inches of drop, though the right amount varies by door and site. This gap gives rain and runoff room to stay outside. Your mason or builder can confirm the target for your project.

Why does my patio send water toward the house?

It usually comes down to height or slope. If the patio sits too high or slopes the wrong way, water drifts toward the door. A brick patio should slope gently away from the building. Correcting the grade is the way to steer water back toward the yard.

Can a brick patio cause foundation problems?

It can if water pools against the house instead of draining away. Standing water near the base of a wall can seep in over time. That moisture may harm the foundation and nearby masonry. Proper height and slope keep water moving away and protect the structure.

Do I need a survey for a patio near my door?

Not always, but accurate elevations help on tricky lots. If the ground already slopes toward the house, precise heights matter more. A surveyor can provide those elevations for a safe design. For simple, flat sites, an experienced mason can often handle the grading.

When should I check the patio grades?

Check them during planning and again before construction wraps up. Early planning sets the right height and slope from the start. A final check confirms the patio drains away from the house. Catching an issue before the last brick is set saves a costly fix later.

Masonry Mailbox Lighting Conduits Must Be Planned Before Construction

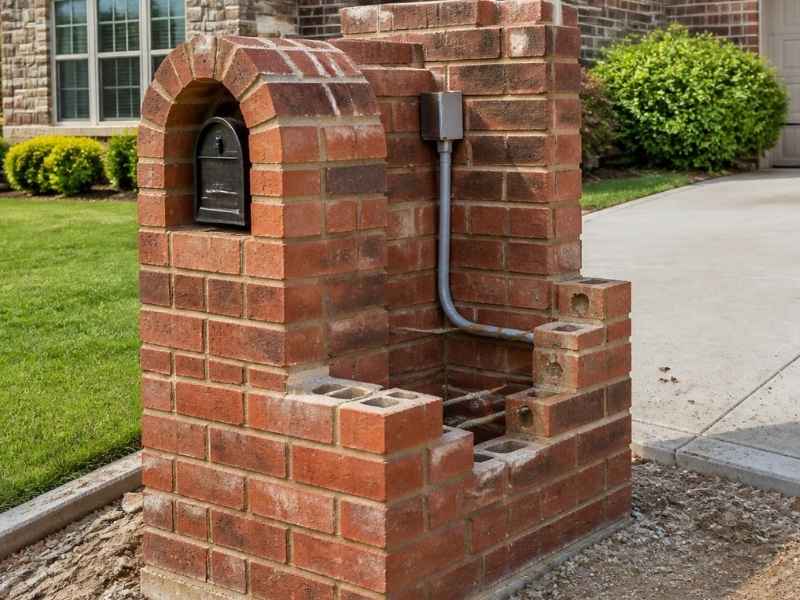
Partially built brick masonry mailbox with a lighting conduit beside a driveway in Birmingham, Alabama

A masonry mailbox with a soft light on top looks great at night. It also helps drivers and guests find your address in the dark. The catch is that the wiring has to go in before the brick does.

A masonry mailbox is built from brick, block, or stone. Once the brickwork or stonework is set in mortar, the structure becomes solid and difficult to change. Forget the wiring, and adding a light later means drilling, chipping, or tearing into finished masonry. That kind of fix is messy, costly, and often leaves a mark.

Here is the takeaway. If you want lights on your masonry mailbox, plan the conduit before construction starts. A conduit is a protective tube that carries electrical wires through the structure. Set it early, and the wiring hides cleanly inside the brick with no damage later.

Why Mailbox Lighting Conduits Must Be Planned Early

Masonry is built for durability, which is exactly why it resists changes. Brick and block get locked in place with mortar, creating a strong structure designed to hold up over time. Once the mortar cures, the mailbox becomes one solid piece, and you cannot easily thread a wire through it after the fact.

Lighting needs a clear path from the power source to the fixture. That path is the conduit, and it has to be in place before the masonry goes up. The crew builds the brick around the conduit, hiding it inside the structure. Try to add that path later, and you are cutting into finished work.

Planning early saves money and looks better too. A hidden conduit keeps wires safe and out of sight. A late add-on often means exposed wire or patched brick. Deciding on lights before construction avoids both problems.

Coordinating Conduit Routes With the Mailbox Foundation

The conduit route starts at the base. Most masonry mailboxes sit on a concrete foundation or footing. That footing anchors the structure, resists shifting over time, and helps the mailbox fit properly with surrounding hardscaping. The wiring usually enters through or beside the footing, so the conduit path needs to be established before the foundation is poured.

This is why the conduit and the foundation must be planned together. The path for the wire often runs underground to the mailbox, then up through the base. If the footing gets poured without a sleeve for the conduit, the route is blocked. Coordinating the two keeps the wiring hidden from the ground up.

Talk through the route before any concrete is poured. A few key points to settle early include:

  • Where the power line enters the mailbox base
  • How deep the underground conduit will run
  • Where the conduit rises inside the masonry
  • Where the light fixture sits at the top

Getting these set before the pour keeps the whole run clean. It also prevents a blocked path that forces changes later.

Planning Power Access for Mailbox Lights and Fixtures

Lights need power, so the source matters. Some masonry mailbox lights run on low-voltage wiring from a transformer. Others tie into a standard circuit. The type you choose affects how the conduit and wiring are planned.

Low-voltage systems are common for landscape and mailbox lights. They use a transformer that steps power down to a safer level. Standard-voltage fixtures give more output but call for more care and often a permit. A licensed electrician can help you pick the right setup.

Plan where the power comes from before construction. The run from the house or a nearby source shapes the conduit route. Electrical work has real safety and code rules, and those can vary by municipality and county. Have a licensed electrician handle the wiring and confirm any permits your project needs.

Avoiding Masonry Damage From Late Electrical Changes

Changing masonry after it cures is the outcome you want to avoid. Cutting into brick to add wiring damages the structure. It weakens the bond and leaves scars that are hard to hide. A neat masonry mailbox can end up looking patched.

Late changes cost more than early planning ever would. A mason may have to remove and reset units. A patched section rarely matches the original brick and mortar. What could have been a simple conduit turns into a repair job.

There is a durability concern too. Masonry sheds water best when it stays intact. Drilling holes or chipping mortar can let water in over time. In a climate with heavy rain and humidity, that moisture can lead to cracks or damage. Planning the conduit early keeps the masonry whole and lasting.

Including Lighting Conduits in the Final Construction Plan

The best way to get this right is to put it on paper. The lighting conduit should be part of the final construction plan for the mailbox. That way every trade knows the plan before work begins.

A clear plan keeps the mason and electrician working together. The plan should show the conduit route, the power source, and the fixture location. When both trades build from the same plan, the wiring fits without a hitch. Confirm the details with your contractor before the first brick is laid.

Treat the conduit as a required step, not an add-on. Decide on lights, settle the route, and lock it into the plan early. If a permit or an electrician’s schedule affects the timeline, sort it out before construction starts. A little planning now gives you a clean, lit mailbox with no regrets.

Frequently Asked Questions

Do I need a conduit for a lighted masonry mailbox?

Yes, a conduit is the standard way to run wiring through masonry. It protects the wires and hides them inside the brick or stone. Setting it before construction keeps the wiring clean and safe. Adding light without a conduit usually means exposed wire or damaged masonry later.

Can I add lights to a masonry mailbox after it is built?

It is possible, but it often means cutting into finished masonry. That can damage the brick, weaken the structure, and leave visible patches. The result rarely looks as clean as a planned install. Planning the conduit before construction avoids all of that.

What kind of power do masonry mailbox lights use?

Many use low-voltage wiring from a transformer, which is common for outdoor lights. Others tie into a standard circuit for more output. The right choice depends on your fixture and your setup. A licensed electrician can help you decide and handle the wiring safely.

Do I need a permit to wire a masonry mailbox light?

You might, since electrical work often falls under local rules. Permit requirements can vary by municipality and county. Standard-voltage wiring is more likely to need one than low-voltage. Check with a licensed electrician or your local office before starting.

Who plans the conduit, the mason or the electrician?

Both should be involved, ideally working from the same plan. The electrician handles the wiring and power source, and the mason builds around the conduit. Coordinating the two before construction keeps the install clean. Settle the route together so nothing gets missed once the brick goes up.

What Removing Exterior Hardware Can Leave Behind on Brick

Damaged brick wall with chipped bricks, open holes, and deteriorated mortar left behind after exterior hardware removal

Exterior hardware almost never comes off clean. A satellite dish, a security camera, an old alarm box, an address plaque, mounting brackets, conduit clips, antenna feet, downspout straps. Each one was screwed, bolted, or anchored into the wall, and each one leaves a mark when it goes.

The most common thing you’ll see is holes. Installers drill into the brick or the mortar joints and set screws or masonry anchors, and pulling those out leaves open holes behind. You might also spot chipped brick faces where a bracket sat tight, spots where the mortar got crushed or dug out, gray or rust-colored stains that bled down the wall, and sticky leftover marks from adhesive pads. Some brick loses a small chunk of material right at the anchor point.

Not every mark is a real problem. A little surface staining or a shallow scuff is mostly a looks issue. Open holes and cracked brick are a different story, and those are the ones worth having a mason look at. Older houses tend to show all of it at once, since hardware has been added and removed on the same wall for decades.

Why Old Mounting Holes Can Become a Brick Repair Concern

An open hole in a brick wall is an open door for rainwater. Water runs down the face, finds the hole, and sits there. From there it soaks into the brick and the mortar around it. Birmingham winters aren’t harsh, but they do dip below freezing, and water trapped in a hole can freeze and push outward. That slow pressure widens the damage a little at a time.

This is why a hardware hole rarely fails all at once. It gets worse quietly. The edges soften, the opening grows, and one season it finally looks bad enough to notice. The weak spot the removed hardware created is doing the work the whole time.

Filling the hole with whatever’s in the garage doesn’t fix this. Caulk, generic crack filler, or the wrong patching mix tends to sit differently than the brick around it. It shows up as an obvious plug, and worse, the wrong material can trap water against the brick or pop back out after a few months. A hole plugged the wrong way can look messier than the hole did.

Matching the Existing Brick When the Hardware Is Gone

Making a repair disappear is harder than it sounds. Brick isn’t just one color. It has a size, a texture, a weathered surface, and a joint look around it, and the patch has to match all of that to blend in. A fresh fill on an aged wall stands out because the old brick has years of sun, rain, and dirt on it that new material doesn’t have.

The bigger challenge is the brick itself. If a whole unit needs replacing, the brick on an older home may not be sold anymore. Colors and sizes change over the years, and a brick made today can sit a shade off or a hair too big next to the original. Good masons hunt for a close match, pull salvaged brick from the same era, or tint and tool the repair so the eye skips right over it. The mortar around the patch has to read right too, but that’s its own careful job.

A repair works when the fixed spot looks like it belongs to the wall. Match the brick well, and a stranger can’t find where the dish used to be. Match it poorly, and the patch is the first thing anyone sees.

When a Small Hardware Mark Needs More Than a Surface Patch

Sometimes the damage runs past the hole itself. The hardware or the way it came off may have hurt the brick around the anchor, and that brick needs more than a fill. Watch for these signs:

  • Cracks running out from the hole into the brick face
  • A hole that’s enlarged, blown out, or crumbling at the edges
  • Loose pieces or bits of brick you can pick out by hand
  • The brick face flaking or chipping off, which masons call spalling
  • A brick that sounds hollow when tapped or shifts when you press it

When you see that kind of damage, patching the surface just hides a problem that keeps growing under the fill. In those cases, pulling the damaged brick and setting a matching one in its place makes more sense than disguising it. Replacing a single unit is a targeted fix. If a wall is leaning, bulging, or cracking across a wide area, that’s a bigger call for a mason to weigh, and it’s a separate issue from a hardware spot.

Updating Older Brick Exteriors Without Leaving a Patchwork Look

A lot of homeowners are modernizing older houses right now, and that usually means stripping off outdated gear. Down comes the dish, the old camera, the dead antenna mount, the mystery bracket nobody remembers installing. What’s left is a wall dotted with repairs waiting to happen.

Here’s the smarter way to handle it. Instead of fixing each hole the day you find it, plan the repairs together as one pass. When a mason treats every former-hardware spot with the same brick, the same mortar approach, and the same finish, the wall reads as one clean surface. Fix them one at a time over months, with different fillers and different weather, and you end up with a patchwork of mismatched spots that looks worse than the hardware did.

Grouping the work also lets you line it up with other exterior updates, so the brick gets restored while the crew is already there. Taking the outdated hardware down is only half the job. Restoring the brick afterward is what makes the house look cared for and intentional, not just changed piece by piece over the years.

Frequently Asked Questions

Can I fill the old holes myself with caulk or filler?

For a tiny surface mark, a careful homeowner can sometimes get by. For actual anchor holes in brick or mortar, store-bought caulk and generic filler tend to look wrong and can trap water or fall out later. A mason uses material that matches the wall and sheds water the way brick should, so the fix holds and blends.

Do old mounting holes really need to be sealed?

Yes. An open hole lets rain soak into the brick and mortar, and water sitting inside can freeze on cold nights and slowly widen the opening. The damage builds up quietly over several seasons. Closing the hole the right way stops that process before it spreads.

What if the original brick on my house isn’t made anymore?

That’s common in older homes. A mason looks for a close current match, sources salvaged brick from the same period, or blends the repair so it settles into the aged wall. The goal is a spot the eye passes over, not an exact factory copy.

How do I know if a brick needs replacing instead of just patching?

Look for cracks spreading from the hole, an opening that’s crumbling or blown out, loose fragments, a flaking face, or a brick that moves or sounds hollow. Those point to brick that’s damaged past the mount. In that case, swapping the whole unit lasts longer than covering it over.

Should I fix all the old hardware spots at the same time?

Doing them together is the better move. One consistent approach across every spot gives you an even, finished wall, while scattered fixes over time leave mismatched patches. It also pairs well with any other exterior work you have planned.

Retaining Wall Planning Near Driveways Must Account for Vehicle Weight

Hillside residential home with a driveway and sloped landscape

A retaining wall near a driveway has a harder job than most homeowners expect. It doesn’t only hold back soil. It may also carry weight from the driveway and the vehicles that use it. That changes how the wall should be planned. In Birmingham, where many lots sit on sloped ground, this matters even more. This piece covers why a driveway changes the picture, why the distance between the two counts, and how site conditions shape the plan. By the end, you’ll know the right questions to ask before any wall goes in near a driveway.

A Driveway Changes What the Wall Has to Support

A retaining wall near a driveway has to deal with more than the soil behind it. Vehicles and the driveway surface can press down on the ground near the wall. That added weight pushes against the wall too.

Engineers call this extra weight a surcharge load. In plain terms, it’s any load that sits on or near the soil the wall holds back. A parked truck can be a surcharge. So can a loaded delivery van or a heavy driveway slab. When that weight sits close to the top of the wall, it adds to the sideways push the wall already feels from the soil.

This doesn’t mean every driveway needs a special wall. It also doesn’t mean there’s one vehicle weight that fits every case. The right design depends on many things at once. Where the wall sits, its shape and height, the soil, the foundation, how the driveway is laid out and the loads it’s likely to see all play a part. Two walls of the same height can need very different plans once a driveway enters the picture.

The Distance Between the Driveway and Wall Matters

How close the driveway sits to the wall changes the planning. A driveway right behind the wall is a different case from one set well back from the edge.

When soil carries a heavy load, it spreads that load down and out at an angle. A vehicle parked close to the top of the wall sends more of its weight against the wall. Move that same vehicle farther back, and less of the load reaches the wall. So the setback isn’t just about looks or space. It affects the push the wall has to resist.

A few things shape this. The wall’s position compared to the driveway is the starting point. So is the room left behind the wall, since a tight gap gives the load less space to spread out. The height difference between the driveway and the ground below matters too. And so does the way the driveway lines up with the wall, along with whether cars can drive, park or turn right next to it.

There’s no single number that’s always safe. You may have read that a wall needs a set distance from any load. Real sites don’t work that way. A short wall on firm soil behaves differently from a taller wall on soft ground. The safe distance depends on the full setup, so a flat rule can mislead you.

Steep Jefferson County Lots Make Site Conditions Part of the Equation

Site conditions carry a lot of weight here, because Jefferson County has plenty of steep ground. Birmingham sits in terrain that rises and falls across short distances. Jefferson County’s comprehensive planning notes that steep land can bring building challenges. These include slope stability, erosion, stormwater and the need for special construction methods.

A steep driveway makes the tie between the driveway and the wall more tangled. On a slope, the existing grade, the driveway height, the retained soil, the wall’s position and where surface water runs can all interact. A driveway that climbs a hill may sit higher than the ground the wall holds. Runoff may flow toward the wall instead of away from it. And there may be little flat room left to build.

None of this means every steep lot has the same soil or the same water problem. It means a steep site adds factors a flat lot doesn’t have. That’s why a wall plan on sloped ground usually needs a closer look at the whole site.

The Wall Design Should Be Based on the Whole Site, Not Just Its Height

Wall height alone doesn’t tell you whether a retaining wall is right for a spot. Height is one input. It’s not the whole story.

Several factors can matter during planning:

  • The height of soil the wall holds back
  • Soil type and how it behaves when wet
  • Groundwater and how water drains near the wall
  • Slope above or below the wall
  • Loads sitting near the wall, like a driveway or parked vehicles
  • Foundation conditions under the wall
  • Property limits, such as lines, easements and setbacks
  • Local rules that apply to the project

Alabama’s retaining-wall guidance describes these walls as a way to hold steep cut or fill slopes. It also notes that poor soil and tight space can affect how they’re used. A short wall on bad soil with a driveway on top can be a bigger task than a taller wall on firm ground with nothing near it. Looking only at height can hide the real work.

Plan the Driveway and Retaining Wall as One Connected Project

Treat the driveway and the wall as one project, not two. They share the same ground, and each one affects the other.

Before building, it helps to think through questions like these:

  • Where will vehicles travel on the site?
  • How close will that traffic come to the wall?
  • How will the grade change from the driveway to the wall?
  • Where will water go once both are in place?
  • Will construction equipment need room to reach the wall?
  • Does the wall cut into the usable driveway space?
  • Do engineering, permits or other approvals apply to this project?

Planning both together helps you catch conflicts early. A wall placed without thinking about traffic can end up too close to where trucks turn. A driveway poured first can box out the room a crew needs to build the wall right. Jefferson County publishes current rules and development documents, so it’s worth checking which requirements apply to your site. There’s no single permit line that fits every wall, so local rules are the place to confirm what your project needs.

Cleaning a Slippery Stone Patio Without Damaging Its Mortar Joints

Cleaning a slippery stone patio while protecting mortar joints in Birmingham, AL

A stone patio can turn dangerously slick in a shaded backyard, and most homeowners do not notice until someone slips near the back door. Thick summer humidity keeps moisture sitting on stone long after a storm passes, and that trapped moisture feeds algae and moss. Before you grab a pressure washer, it helps to know what causes the slick film and why the wrong cleaning method can wear down the stone or the mortar joints holding it together. This guide covers safe cleaning steps, common mistakes to skip, and how to keep your patio from getting slippery again. A quick check, almost like a small construction survey of your joints, before you start can save you from a repair bill later.

Why Stone Patios Become Slippery in Shaded, Humid Yards

Shade feels great on a hot afternoon, but it is not kind to stone. Trees, fences, and covered porches block the sun that would normally dry a patio within an hour or two. Add Birmingham’s humidity, and water can sit on the surface for most of the day.

That damp environment is exactly what algae and moss need to grow. A thin green or black film builds up in the low spots and along the joints first, since water pools there longest. It might not look like much from a distance. Step on it, though, and the surface acts almost like wet glass. Leaves and pollen add to the mix, breaking down into a slippery organic layer that clings to porous stone.

Choosing a Cleaning Method That Protects Stone and Mortar Joints

Not every stone patio can handle the same cleaning approach. Limestone and sandstone are soft and absorb liquids quickly, so they scratch and stain more easily than granite or slate. Check your stone type first, and take a close look at the mortar joints too. Cracked, crumbling, or recessed joints need a gentler hand than solid ones.

A soft-bristle brush paired with a cleaner made for natural stone is usually the safest starting point. Work in small sections and let the cleaner sit for a few minutes before scrubbing. Rinse with a garden hose or a pressure washer set to its lowest setting, and always aim the spray at an angle rather than straight down into the joints. This keeps water pressure from digging out the mortar between stones.

Cleaning Mistakes That Can Damage a Stone Patio

The biggest mistake homeowners make is cranking a pressure washer up too high. A narrow, high-pressure nozzle can blast right through aging mortar in seconds, leaving gaps that let weeds and water in. Once that happens, the joints weaken further with every freeze and thaw cycle.

Harsh acidic cleaners are another problem. Products built for concrete or vinyl siding often contain acids that etch softer stone or bleach its natural color. Bleach and vinegar solutions cause similar issues over time, and they can strip the protective sealant if your patio has one. Stiff wire brushes scratch the surface too, creating tiny grooves where dirt and algae settle in even faster than before. When in doubt, test any product on a hidden corner of the patio first.

Removing Algae and Surface Buildup From a Slippery Stone Patio

Algae removal does not require anything harsh. Start by sweeping away loose leaves and debris so you can see where the buildup is worst. Apply a stone-safe cleaner or a mild oxygen bleach solution, then give it time to break down the algae before scrubbing.

Focus on walking paths first, since that is where a slip is most likely to happen. Corners and joints usually need a few extra passes with the brush because algae grips rough, porous surfaces more than smooth ones. Rinse thoroughly once you are done. Leftover cleaner can attract dirt just as fast as the algae did, undoing your work within a few weeks.

Reducing Future Slippery Buildup in Shaded Outdoor Areas

Cleaning solves the problem for now, but a shaded patio will slowly build up algae again unless something changes about how it dries. Trimming back low branches or thick shrubs near the patio lets more air and sunlight reach the surface, which speeds up drying after rain.

Clear leaves and pollen regularly instead of letting them pile up in corners. Standing water is another culprit, so check whether your patio drains properly after a storm. Low spots that hold water for hours are the first places algae returns. A light sealant made for your specific stone type can also help, since sealed surfaces shed water more efficiently than bare stone does.

Frequently Asked Questions

Why does my stone patio become slippery even when it looks clean?

A surface can look fine while still holding a thin layer of algae or mineral film that only becomes obvious once it gets wet. This is common in shaded spots that stay damp longer than the rest of the yard.

Can pressure washing damage mortar joints on a stone patio? 

Yes. Too much pressure, or holding the nozzle too close, can erode mortar and loosen stones, especially if the joints were already cracked or aging before you started cleaning.

What type of cleaner is safest for a natural stone patio? 

Choose a cleaner labeled safe for your specific stone type, whether that is limestone, sandstone, granite, or slate. Test it on a small, hidden section first to make sure it does not change the color or texture.

How can I remove algae from a stone patio without damaging the surface? 

Use a soft brush and a stone-safe cleaner, let it sit for a few minutes, then rinse with gentle water pressure instead of relying on force alone. Repeat on stubborn spots rather than scrubbing harder.

How often should a shaded stone patio be cleaned? 

It depends on how much shade and moisture the area gets. A patio under heavy tree cover may need cleaning every few months, while a sunnier spot might only need attention once or twice a year.

Outdoor Kitchen Service Openings Make Future Appliance Repairs Easier

Outdoor kitchen in Birmingham with an accessible service opening for easier appliance repairs and utility maintenance.

Building an outdoor kitchen is one of the biggest upgrades a homeowner can make to a backyard. But before the first block goes down, a good contractor should walk the site like a construction survey, checking where pipes, wires, and gas lines will run. That early planning step decides whether a broken grill igniter costs you fifty dollars or an entire weekend of demolition. This is where service openings come in. They are small, planned gaps built into the masonry that let a technician reach the parts hiding behind the stone.

Most homeowners never think about this until something breaks. By then, the outdoor kitchen looks perfect from the outside, but nobody can get to the gas valve without tearing into the counter. A little planning up front avoids that headache for years to come.

Planning Service Openings Around Appliances

Every appliance in an outdoor kitchen needs its own plan for access. A built-in grill has an igniter, a gas line, and sometimes a rotisserie motor tucked behind the front panel. A refrigerator needs airflow and a spot to reach the compressor. A sink needs room for a shutoff valve and a trap.

Birmingham’s humid summers and occasional freezes put extra strain on these components, so repairs happen more often than people expect. If the layout skips access points, a plumber or appliance tech has to guess where to cut. That guesswork almost always means more damage than the original repair required.

A better approach starts at the design table. The builder maps out where each appliance sits, then decides where a panel or opening needs to go so a person can actually reach the parts. It sounds simple, but a lot of outdoor kitchens skip this step entirely.

Sizing Openings for Real Repair Access

A tiny slot is not the same as a working service opening. Some contractors leave a small gap just to hide a wire or hose, and that gap does nothing when the whole appliance needs to come out for repair or replacement.

The right size depends on the actual equipment. A grill’s spec sheet usually lists the clearance needed to pull the burner tray or unscrew the control panel. A fridge needs enough room around it for a tech to slide it forward without cracking the surrounding tile. Sinks need space below for hands and tools, not just for the pipe itself.

Pulling these measurements from the manufacturer before construction starts saves a lot of frustration later. It also means the opening works for the appliance you have now and for a similar model down the road, not just for the one narrow task the builder had in mind.

Keeping Gas, Electrical, and Plumbing Connections Reachable

Shutoff valves, outlets, and plumbing joints all need a clear path, not just an opening somewhere nearby. If the gas shutoff sits two feet behind a solid stone wall, it does not matter how nice the opening looks elsewhere. Nobody can turn off the gas quickly in an emergency.

This part of the process has to happen before the masonry enclosure gets sealed up. Once stone or stucco covers the frame, moving a valve or outlet means cutting into finished work. Coordinating the gas line, electrical run, and water supply with the mason ahead of time keeps everything reachable without a single crack in the finish.

A good rule of thumb: any connection point that a technician or inspector might need to touch should sit within reach of an opening, not buried behind a permanent wall.

Designing Removable Panels Without Disrupting the Finished Look

Nobody wants an outdoor kitchen that looks like a utility closet. The good news is that access does not have to fight with style. Removable panels can match the surrounding stone, tile, or stucco so closely that guests never notice them.

Magnetic panels, hinged doors, and stainless access doors all work well in outdoor settings. The trick is placing them in spots that make sense, like below a grill or beside a fridge, rather than wherever is easiest to build. A panel on the front of an island stands out. One built into a side wall or a low kick panel blends right in.

Good design treats access as part of the plan from day one. That is a very different result than cutting a hole into finished stone after something breaks.

Preparing the Outdoor Kitchen for Future Appliance Replacement

Appliances do not last forever. Grills, fridges, and ice makers all wear out eventually, and when that day comes, the space around them matters as much as the opening itself. If a fridge cabinet is built exactly to the millimeter for one model, a slightly larger replacement may not fit at all.

Leaving a bit of extra clearance around major appliances, and keeping their rough dimensions on file, makes future swaps far less painful. A contractor who confirms appliance specs early, rather than guessing, sets the whole project up for smoother repairs and replacements years down the line.

Thinking ahead this way protects the investment. Nobody wants to knock out a stone counter just because a new grill is two inches wider than the old one.

Frequently Asked Questions

Why does an outdoor kitchen need service openings?

Service openings give a technician a direct path to utilities, connections, and appliance parts that may need attention later. Without them, routine maintenance can turn into a much bigger repair job.

Where should service openings be placed in an outdoor kitchen?

They should sit wherever real work needs to happen, close to valves, outlets, and appliance backs. Their placement should match the appliance layout and still fit the overall look of the finished structure.

Can access panels be incorporated into a masonry outdoor kitchen?

Yes. Access doors and removable panels can be built into the masonry so a tech can reach what’s needed while the outdoor kitchen still looks clean and finished from every angle.

Should appliance models be selected before building the outdoor kitchen?

It helps a lot. Knowing the exact appliance specs ahead of time lets the builder size openings, plan utility placement, and set clearances correctly the first time.

Can poor service access make outdoor kitchen repairs more expensive?

Yes, often significantly. When utilities or appliances are hard to reach, a repair crew may need to remove extra stone or tile just to get to the problem, adding cost and time that proper planning would have avoided.

Mounting a Mantel on a Stone Fireplace Requires More Than Standard Anchors

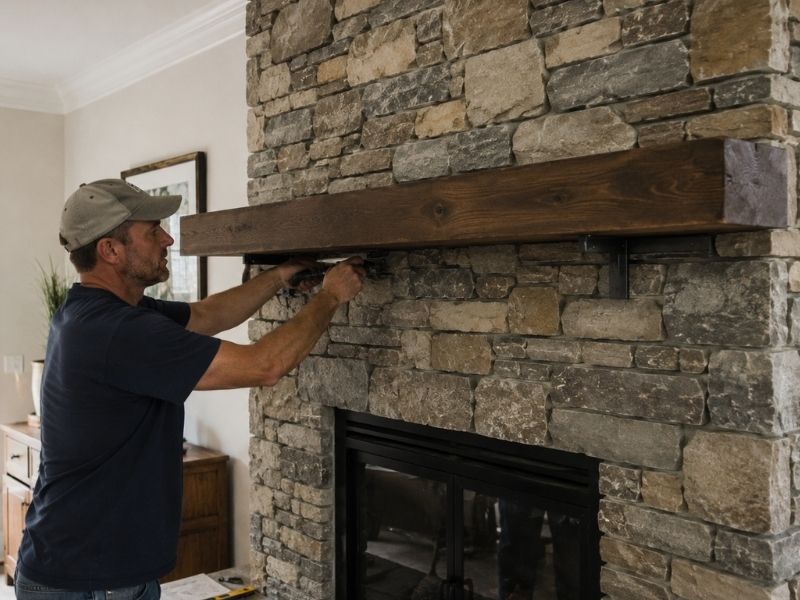
Contractor mounting a wooden mantel securely on a stone fireplace during a custom living-room renovation in Birmingham.

A stone fireplace looks solid from across the room, but that surface hides a lot of secrets. Homeowners often assume any wall anchor will hold a new mantel in place. That assumption causes more cracked stone and loose shelves than most people realize. Before you drill a single hole, it helps to treat the wall like a small construction survey. You need to know what the stone sits on, how thick it is, and where the weak spots hide.

How to Evaluate the Stone Fireplace Before Choosing a Mounting Method

The stone you see on the front of a fireplace is just a thin layer. Behind it sits a backing wall made of brick, block or even plywood and metal lath. That backing decides how strong your anchor points will be, not the pretty stone on top.

Start by figuring out what kind of stone you have. Natural fieldstone behaves differently than manufactured stone veneer. Natural stone is often thicker and denser, so it can handle deeper anchors. Manufactured veneer is thinner and can crack more easily under pressure.

Next, look at the mortar joints. Wide, deep joints usually mean sturdier construction. Thin or crumbly joints are a warning sign. Check the general condition too. Look for chips, hairline cracks or areas where stone pieces feel loose to the touch.

None of this takes long, but it changes everything about how you plan the mount.

Why Standard Anchors May Not Provide Enough Support for a Stone Fireplace

Plastic wall anchors and simple screws work fine on drywall. Stone is a different animal. Irregular surfaces make it hard for standard anchors to seat properly, so they can spin, crack or pull loose over time.

Think about the physics at play. A mantel doesn’t just sit against the wall. It sticks out several inches, sometimes more than a foot. That distance adds extra pulling force on every anchor point, and the further the mantel reaches out, the more that force multiplies where it’s fastened. A twelve pound mantel shelf can put far more stress on its brackets than its weight alone suggests.

Depth matters too. An anchor that barely grips the surface layer of stone or mortar won’t hold up against that kind of pull. You need fasteners that are rated for masonry, sized to reach solid material and spaced to spread the load across multiple points.

Skip this step, and you’re trusting a heavy shelf to hardware that was never built for the job.

Choosing Mounting Locations That Protect the Stone Fireplace Surface

Not every inch of a stone fireplace makes a good anchor point. Some areas sit right on solid backing. Others cover gaps, seams or old repairs that won’t hold weight no matter what hardware you use.

Before marking your holes, look closely at the surface. Skip any stone that feels loose, sounds hollow when tapped or shows cracks running through it. Areas near the firebox opening often see more heat and expansion over the years, so they may have shifted slightly out of place.

If you’re planning a bigger living room renovation in Birmingham, AL, this is a good moment to think about mantel placement as part of that larger project. A contractor who understands the whole room, not just the fireplace, can help you pick spots that support the mantel now and won’t cause problems once the rest of the renovation wraps up.

Good placement protects both the mantel and the stone underneath it.

How Custom Mantel Designs Affect Attachment Planning

Standard mantels bought off the shelf come with predictable weight and size. Custom designs change the math completely. A reclaimed wood beam can weigh three or four times more than a basic pine shelf of the same length. A deep floating mantel with no visible brackets puts even more demand on hidden hardware.

Floating mantels are especially tricky. Since there’s no visible bracket, the entire weight rides on a steel rod or bracket system buried inside the stone. That system has to match the exact thickness and density of your wall, or it simply won’t hold.

This is why mantel dimensions and materials should be settled before fabrication begins, not after. A carpenter building your custom piece needs to know what the wall can support so they can design brackets, rod placement and shelf depth around that limit.

Plan the mantel and the mounting system together, and you’ll avoid a lot of headaches later.

When Existing Stonework Should Be Inspected Before Mounting a Mantel

Sometimes the stone itself needs attention before a mantel goes anywhere near it. A few warning signs are easy to spot once you know what to look for.

Watch for stones that shift slightly when you press on them, cracks that run across multiple pieces instead of just one and mortar joints that crumble or leave gaps when touched. Water stains near the base can also point to moisture getting behind the stone, which weakens the whole structure over time.

If you notice any of these signs, it’s worth having the stonework checked before you add a mantel or anything else to the wall. Fixing loose stone or repointing old mortar now costs far less than repairing a fireplace after a mantel comes loose and takes chunks of stone with it.

For anyone planning a full living room renovation, this inspection fits naturally into the early planning stages. Handle the stonework first. Then build the finished look on top of a wall you can actually trust.

Frequently Asked Questions

Can you mount a mantel directly onto a stone fireplace?

 Yes, but the method depends on the stone type, the backing material and the mantel’s weight. A quick inspection before drilling tells you which anchors and locations will actually hold.

What type of anchor works best for mounting a mantel on stone? 

Masonry sleeve anchors or heavy duty concrete screws generally work best. The right choice depends on the stone’s thickness and what sits behind it, so a fastener rated for masonry beats a standard wall anchor every time.

Is it better to drill into the stone or the mortar joint? 

Solid stone usually holds more weight than mortar joints, which can crumble under pressure. That said, thin or fragile stone isn’t always a good target either, so the backing material behind both should guide the final call.

How much weight can a stone fireplace support with a mounted mantel? 

It varies widely based on the backing wall, the anchor type and how the weight spreads across multiple mounting points. A heavier or deeper mantel needs more anchor points, spaced further apart, to stay secure.

Can a floating mantel be installed on an existing stone fireplace? 

Yes, though it takes more planning than a bracket mounted shelf. The hidden rod or bracket system has to match the wall’s thickness and strength, so this option usually works best when it’s planned early, before the stone goes up.

Outdoor Fireplace Ash Cleanouts Need Access After Construction Ends

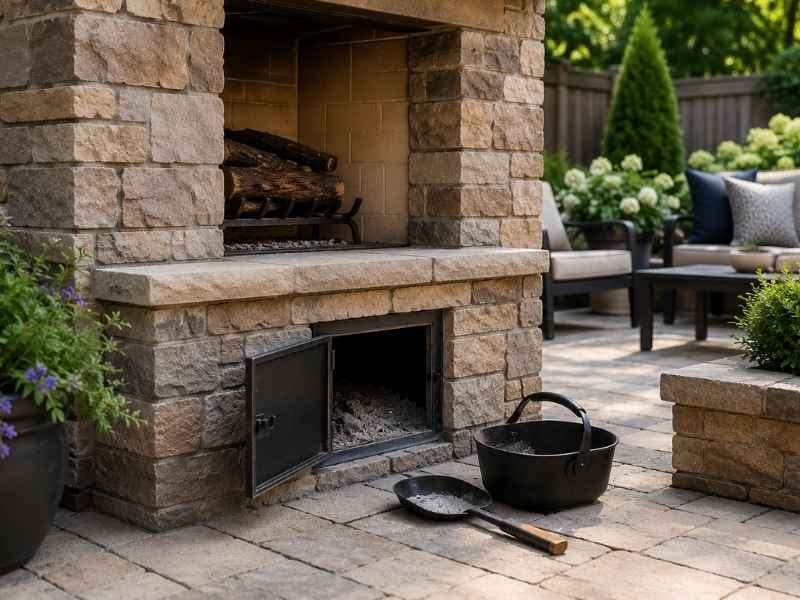
Outdoor fireplace with accessible ash cleanout in a Birmingham, Alabama backyard

A backyard fire feels great right up until the day you have to clean it out. An outdoor fireplace burns real wood, and every fire leaves behind ash that has to go somewhere. Most built-in models handle this with an ash cleanout, a small door near the base that lets you scoop out what’s left after the flames die down. The trouble usually shows up later. Once the masonry is finished and the patio fills up with furniture and plants, that little door can end up boxed in.

Why Ash Cleanout Access Matters After an Outdoor Fireplace Is Finished

Ash piles up fast when you burn wood, and it has to come out somewhere. The cleanout is the door you’ll use for that job every few weeks, so it needs to stay open and reachable. When it doesn’t, ash builds up inside, blocks airflow under the fire, and holds moisture against the firebrick. That mix wears down mortar and brick faster than most people expect.

There’s a safety side too. Fire safety guidance warns that wood ash can stay hot enough to start a fire for several days after a burn. If you can’t get to the cleanout easily, that hot ash sits longer than it should. A finished stone surround looks like the end of the project, but the cleanout is the part you actually live with for years. When furniture, planters or a fresh patio crowd it, a simple chore turns into a headache.

Where to Position an Ash Cleanout for Easy Backyard Access

The best time to decide where the cleanout goes is before the fireplace is built, while you can still picture how the yard will really be used. Think about your walking paths, your seating area and the spots where people gather when you entertain. Then put the cleanout door on a side you can walk straight up to, ideally facing an open path instead of a wall or a planting bed.

Leave enough room in front to kneel down with a shovel and a metal bucket. If the door opens toward the main seating, you’ll be reaching across chairs every time, so aim it somewhere clear instead. A small paver pad in front helps too, since you won’t be kneeling in mud or mulch. These little choices cost nothing during planning, and they save you real trouble once the space is finished.

How Finished Masonry Can Make Ash Removal More Difficult

Stone veneer and thick surrounds add width to a fireplace base, and that extra bulk can leave the cleanout door with almost no room to swing open. When a raised bed, a built-in bench or a side counter sits right against the opening, you lose the space you need to work. Some of these features get added late, after the fireplace already looks done, so nobody notices the conflict until the first cleanup.

The catch with masonry is that it’s hard to undo. Once the mortar has cured and the veneer is set, moving a cleanout means cutting into finished work, and that gets expensive. Checking clearance before the last courses go up is far cheaper than fixing it after. A good habit is to open the door fully during the build and confirm a shovel and bucket still fit with room to spare.

Planning Ash Removal Around Frequent Outdoor Fireplace Use

Birmingham’s mild winters mean plenty of folks burn outdoor fires through much of the year, not just a few weekends. More fires mean more ash, and it adds up quicker than a once-a-season fireplace ever would. A firebox that hosts a weekly gathering fills up fast, so the cleanout gets a real workout.

Manufacturer guidance commonly says to leave a thin layer of ash, about an inch, under a wood fire for insulation, then clear out the rest so air can move properly. If reaching the cleanout is a pain, people put it off, and packed ash starts trapping damp against the masonry. Over time that moisture is rough on firebrick and mortar joints. A cleanout that stays convenient is the difference between a two-minute chore and a job you keep avoiding.

What to Check Before the Backyard Fireplace Project Is Considered Complete

Before you call the project done, run one simple access test. Open the cleanout door all the way, kneel in front of it, and reach inside with a shovel the way you would on a real cleanup day. Make sure a bucket fits under or beside the opening without bumping into anything permanent.

A few things worth confirming while you’re there:

  • Nothing fixed blocks the door, such as a set stone bench, a built planter or an irrigation line.
  • Movable items like chairs and pots can shift aside easily.
  • The door swings open fully without hitting veneer, edging or a wall.
  • You have solid, dry footing to kneel on.

If something permanent is in the way now, it’s far simpler to adjust before the final landscaping goes in. Once the plants are established and the last stone is set, small fixes turn into big ones.

Frequently Asked Questions

Why does an outdoor fireplace need an ash cleanout?

Burning wood always leaves ash behind, and you have to clear it so the firebox stays open. When too much builds up, it chokes the airflow under the fire and traps moisture against the masonry. A cleanout gives you a simple way to pull that ash out and keep the fireplace working the way it should.

Where should an outdoor fireplace ash cleanout be located?

It should sit somewhere you can still reach after the patio, plants and seating are all in place. A door facing an open path or clear area works far better than one tucked behind a bench or a raised bed. Planning that spot early keeps the cleanout usable once the yard is finished.

Can landscaping block access to an outdoor fireplace cleanout?

Yes, and it happens more than people think. Shrubs, planters, decorative stone or a new patio surface can all crowd the door and leave you no room to work. That’s why the area right around the cleanout should stay clear when the landscaping plan comes together.

How often should ash be removed from an outdoor fireplace?

It depends on how often you burn and how your fireplace is built. Frequent use calls for more frequent cleanouts, while an occasional fire can go longer between them. The main thing is to not let ash pile up, since a thin layer is fine but a packed firebox is not.

Should ash cleanout access be checked before construction is finished?

Checking access before the masonry and landscaping wrap up can save you money and frustration later. It’s easy to adjust a tight spot while the crew is still on site and the finishes aren’t set. Once everything is complete, fixing a blocked cleanout usually means cutting into work you already paid for.